
Deeper Cooling
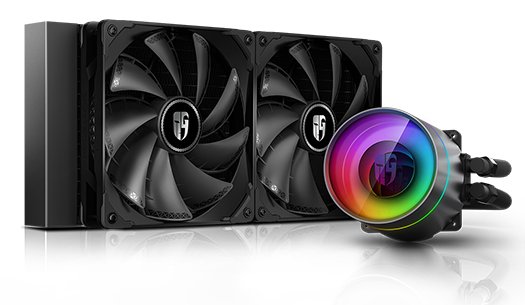
Given it was the weekend, I finally decided to install the Deepcool Castle 280ex and 32GB of extra G.Skill Trident-Z NEO RAM I ordered a couple weeks ago. Given how things can go unexpectedly while wrestling with the innards of a computer, I gave myself ample time to do everything, and I’m glad I did.
But first things first. I haven’t really cleaned my computer since I built it in July of 2020. This thing is sitting right next to one of the litter boxes, and quite a bit of the finer liter dust made it into the case. Thankfully I have an X-Power duster, and that thing could strip the paint off of my car. I figured firing up my air compressor to dust my computer was probably overkill. And as a plus, I certainly have plenty of N95 masks sitting around due to recent events, so no breathing dust for me!
Installing the RAM was as easy as expected. Really, you just move a retention clip and shove it in there, and wobble it a bit to make sure it’s securely in the slot. Nothing to it. The cooler on the other hand, was a bit of an adventure.
Deceptively Shiny
I suspected installing this thing would take several hours, and I was right. The first thing I needed to do was remove the old components. This included:
- The old cooler itself. First I unhooked the CPU fan header from the cooler. Then I had to flip the tension lever and remove the retaining clips for the cooler itself. It took a bit of wobbling, but nothing problematic.
- Rubbing down the CPU heat spreader with an alcohol wipe to make sure it was clean from any residue.
- The front fan. My Lian Li Lancool II case has a very convenient front radiator bracket. Two thumbscrews and it was out, and then I just had to remove four fan screws for the fan that came with the case itself.
- The stock cooler mounting system. This required removing screws from the plastic mounts for the retaining clips. This is also where I ran into trouble. Once the mounts were unscrewed, the steel backplane had nothing holding it to the motherboard.
This made mounting the new cooler something of a problem. What could I possibly do with a backplane that would simply fall off of the motherboard if I tried to use it?
I screwed in a single of the two-sided thumbscrews that holds the CPU backplane in, and… it was extremely wobbly. Surely, this shouldn’t be the case! So I searched for people having issues installing this particular AOI, or having to buy a replacement backplane, and several other variants, and came up dry. I even considered flipping the backplane around and using the recessed portion of the pins to make the thumbscrews sit flush with the motherboard. I ultimately nixed this because the backplane is steel, and there are clearly exposed traces on the underside of the motherboard.
But then I shrugged my shoulders and put in all four thumbscrews. The top layer of the screws was slightly lower than the CPU heat spreader. So… despite the fact the backplane was about as secure as a tower of ladders, that appeared to be the correct approach.
Despite my misgivings about this janky mount, I shouldered on to the next phase: installation. This process was a bit more time-consuming and involved:
- Attaching the mounting hardware to the water block. For an AM4 system, this included two wings with a couple of slots for the other end of the double-sided thumbscrews. These slots were about three screws wide, so they apparently expected a bit of variation in the screw placement.
- Figuring out the direction of airflow of the fans, and installing them on the radiator. I selected to have them push into the radiator, which would have them pulling air through the front of the case through the protective mesh. Less dust!
- Mounting the radiator to the removable radiator mount. The Lancool II has a very mount that is only held in with two thumbscrews at the top. The bottom is secured in an angled slot so you can tip the whole assembly in and out like a lever. I mounted the radiator so that the tubing would come out at the bottom, which is important so any air bubbles settle at the top of the radiator rather than in the tubing.
- Removing the optional case panel that blocks AIO installation. This is basically the top front of the bottom accessory panel, allowing it to cleanly sit flush with the front panel. The screw holding it in was seized, so I had to break out one of my larger screwdrivers, as the finger-size ones I use in computers didn’t have enough leverage and threatened to strip the screw head.
- Installing and securing the radiator assembly. This was so smooth! Just insert the assembly into the mounting slot, push it forward, and tighten the thumbscrews.
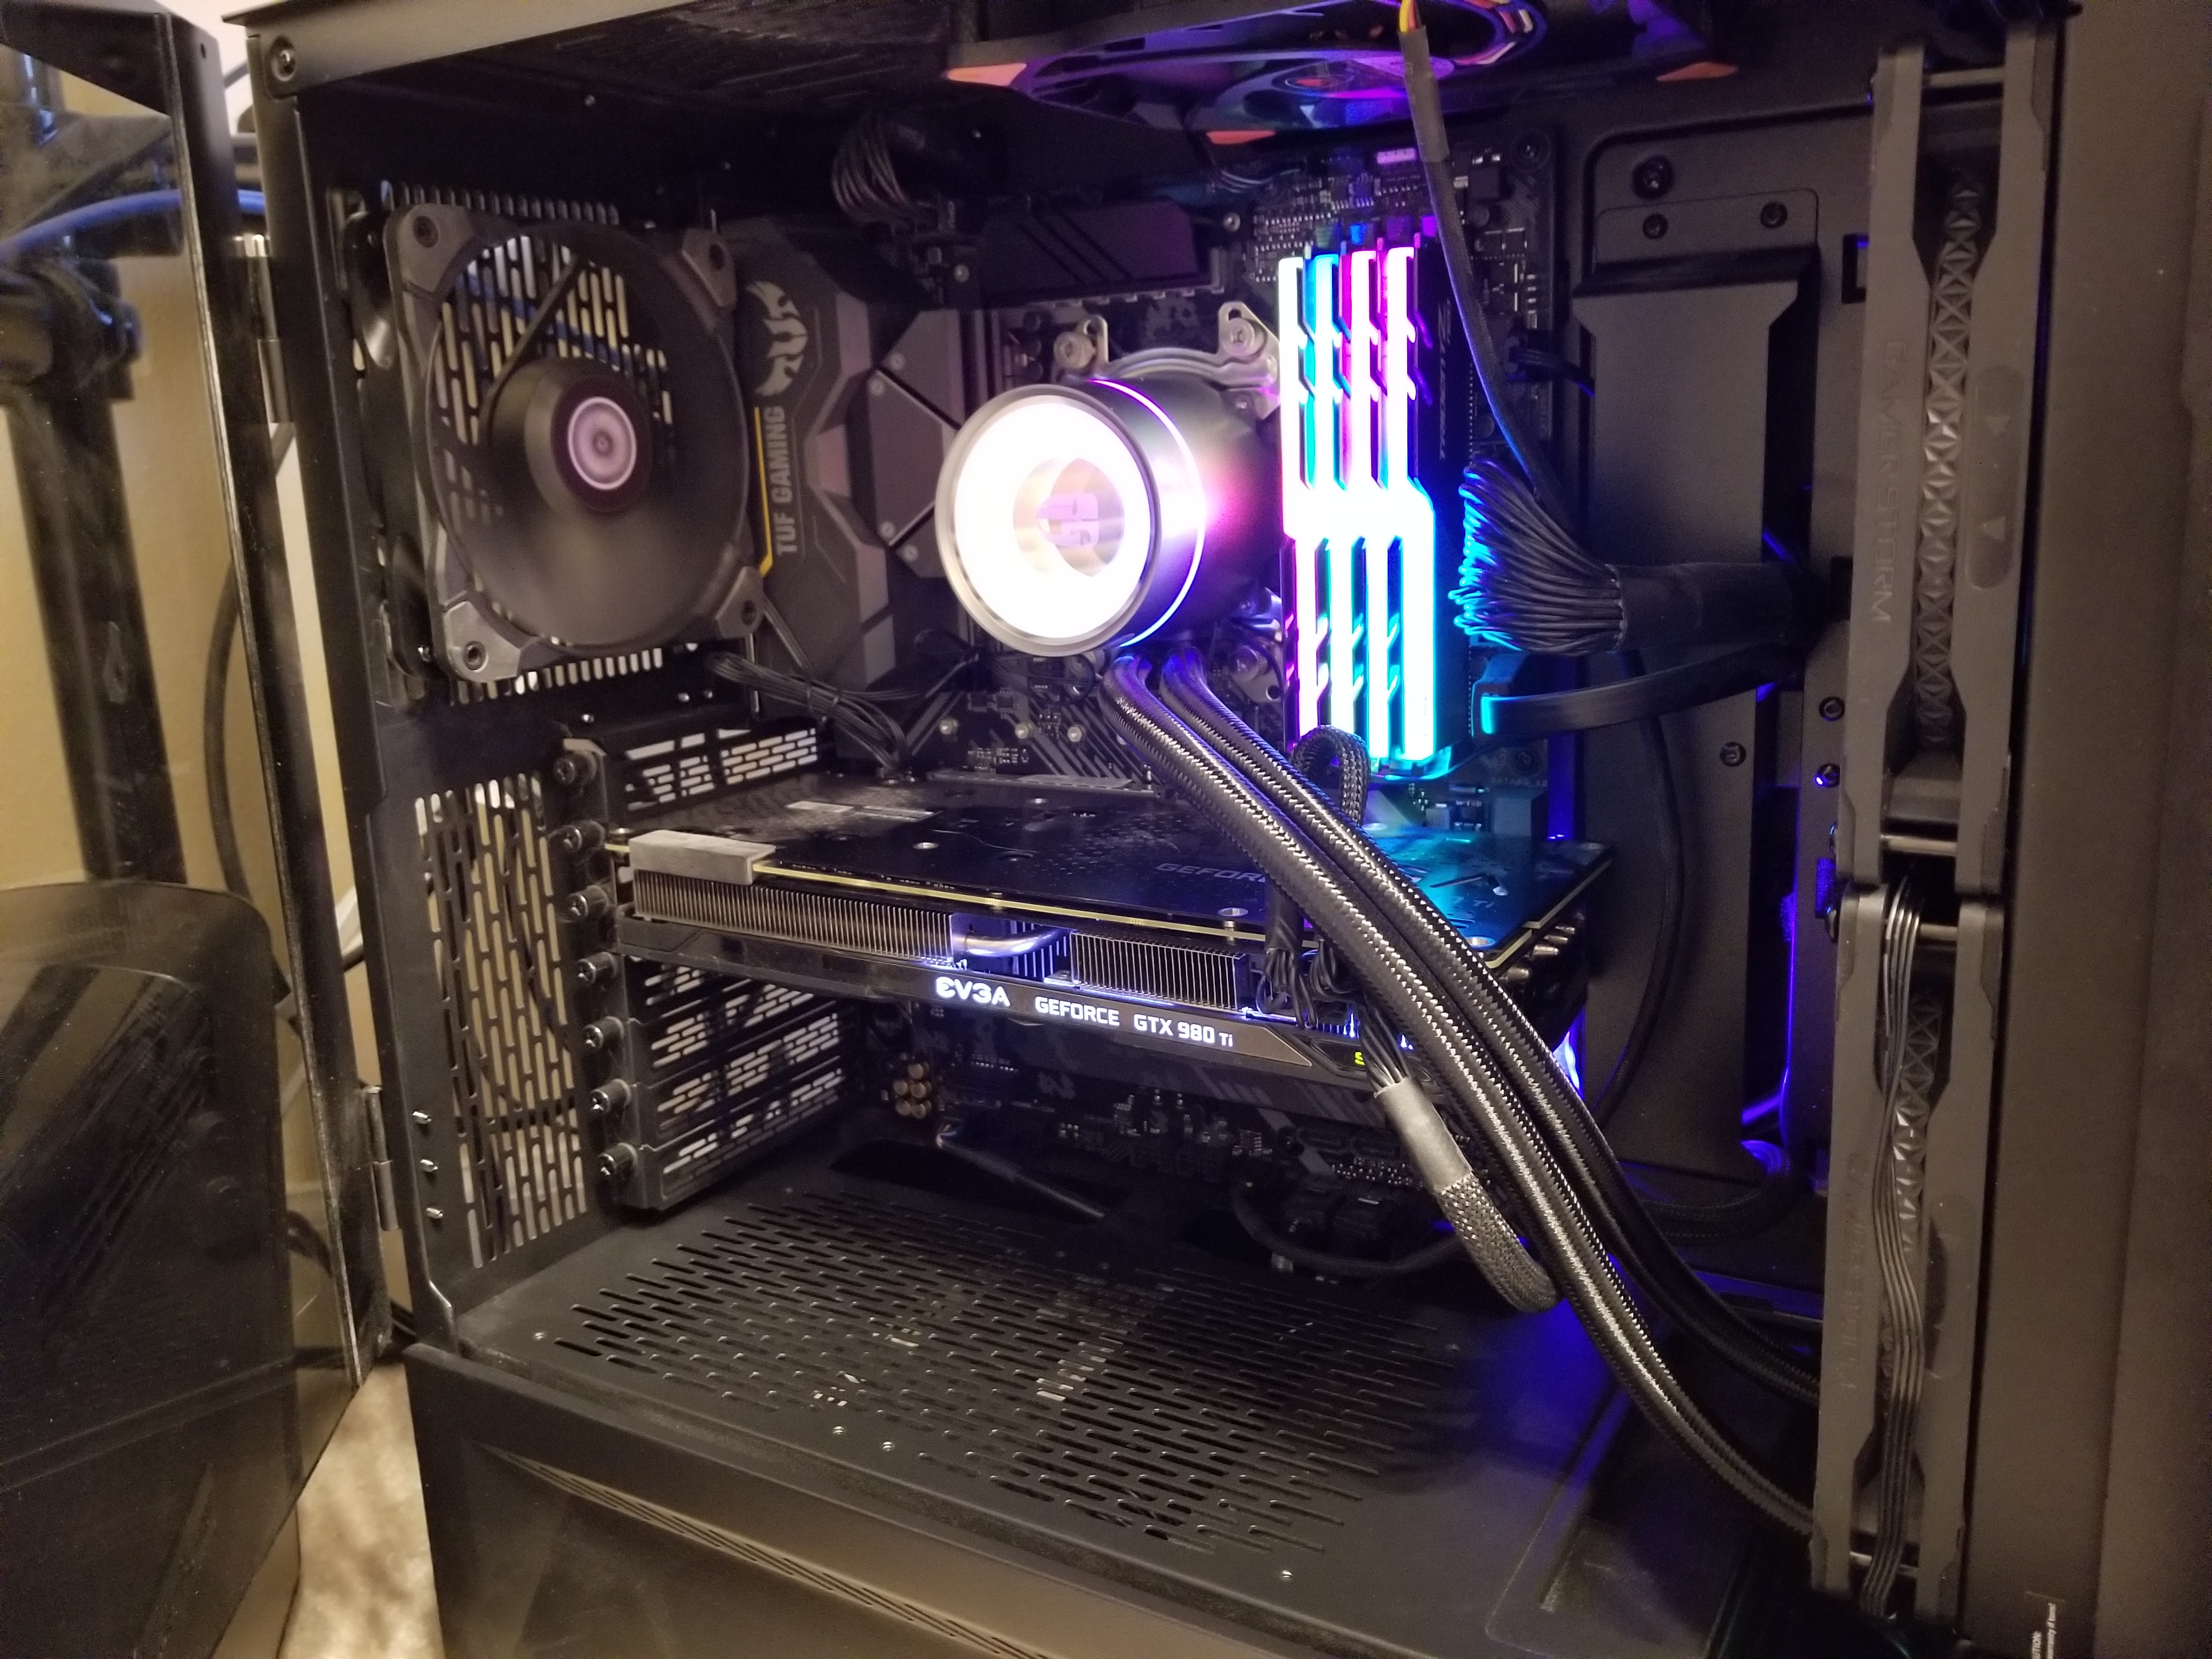
- Attaching the water block to the CPU. This is when I discovered that I attached the mounting wings on the wrong orientation of the block. I did it according to the picture in the diagrams, but if I wanted the water tubes to point down toward the bottom of the radiator, I’d have to move them to the sides. With that out of the way, I just slipped the block over the screws and used the thumbscrew caps to secure everything.
- Hooking up the wiring. This required attaching both fans to a 2-way adapter and plugging it into the CPU FAN header. I plugged the block’s water pump into the AIO PUMP header, and the ARGB header into an adapter which attached to the case’s ARGB router.
- Redoing my cable management to integrate everything properly.
Just to make sure everything was working right, I hooked the case up to all the wires but without any of the panels and turned it on. It was then that I noticed that the top case fan wasn’t spinning at all, and that explained why I occasionally heard a high-pitched sqeaking noise when I bumped the tower. Luckily I had a spare 140mm fan I’ve been meaning to swap it for anyway, so I took the opportunity to do that.
One important note about the top case fan. I set this up to be another input fan so it would pull air through the top mesh filter. This means I had two 140mm fans in the front pulling air in, another at the top, and only one 120mm fan in the back acting as an exhaust. This helps to maintain positive air pressure and is extremely important to system builds in dusty environments. With insufficient venting, all remaining air must exit through gaps or holes in the case, of which there are many. I didn’t bother with this before because I didn’t have enough fans, but that was easy to fix with the additional radiator fans. Dust should accumulate much more slowly now.
The final step was a tour into the BIOS to auto-detect the optimal fan curves so it runs a bit quieter with the new airflow. Afterwards, I ran a short stress-test to see just how well all of this worked. The on-board sensors show an idle CPU drop of about 20c, and a 24-cpu burn-in never took it above 73c. I’d say that’s a success.
Just enough RGB
So, it basically took all of the free time I’d allotted myself this Sunday, but I don’t mind rearranging the innards of my computer. It all worked out, and now I’ve got more spare parts. What’s not to love?
Until Tomorrow